A menu, in website terms, is essentially a navigational aid that allows users to find information on your website. Menus have evolved over time and are now crafted very much with marketing elementives in mind. In some quarters of the industry, they are now referred to as the ‘visitor journey’ - carefully designed to encourage users on a particular route through a website to reach an elementive. But, no matter how they are constructed and whatever their purpose, they are fundamentally all the same thing - a series of easily accessible links that take users from one page to another. The menu element in Sparkle looks like this.

When first added to the canvas of a new, empty site, it has a default appearance like this.

It’s a single button with the name Home in it, signifying that it is a link to the home page of the site. As new pages are added to the site, the menu grows to include the new pages as and when they are added - this is the default behaviour of the menu element. It’s important to note that these are known as ‘top-level’ links and one link will be created for each top level page added to the site. If, however, a SECTION is added to the site, the link will become a SECTION link and pages added to the SECTION will become submenu items of the SECTION link. Here is an example of a menu with one home page, and a SECTION with two pages within the Section.

When adding sections to a website, the section link won’t actually go to a physical page when it’s clicked. Instead, it will open the drop-down to display the pages within that section. By way of practical example, assume we want a simple website comprising of a Home page, an About Us page, a Products section with two pages - one for Smartphones and one for Tablet Devices. We may also want a Contact Us page. To have Sparkle automatically create this menu for us, all we need to do is add the pages and sections in the Pages panel on the left of the Sparkle Interface. When adding Top level pages, click the ‘+’ icon at the foot of the pages panel and choose Top Level from the Drop-down selector next to Add Page.
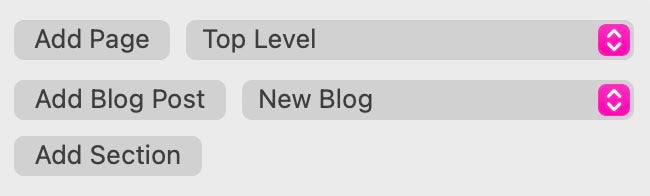
To add a new SECTION, click the Add Section button. This will create a new section with no pages. Once a section is created, you can rename it in the pages panel on the left of the screen - just click on the section name and rename it, in our example, Products.

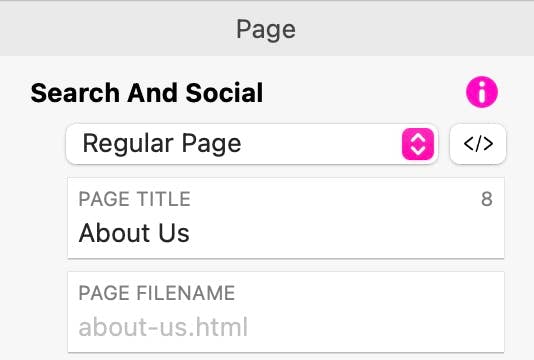
You can now add the two product pages for Smartphones and Tablet Devices by clicking the ‘+’ icon at the foot of the pages panel, and choosing ‘Products’ in the dropdown selector next to the Add Page button. You can rename actual pages in the same way as your renamed the section, just click on the page name and change it to one you want. Alternatively, you can select the pages one by one, and set the page name in the Pages tab over on the right of the screen.
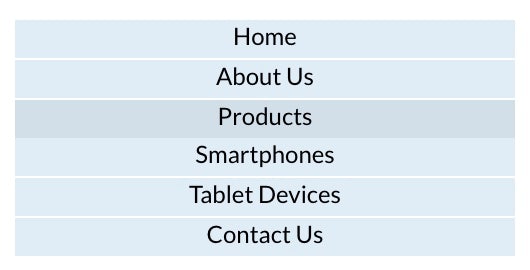
With your pages and sections correctly named, you can now add the menu element to your home page. It will look something like this.

What Sparkle has done is gathered up your page and section names and created the menu for you. Furthermore, if you create additional pages and/or sections later on, they can be automatically added to the menu as you build your site., Just be sure that the Auto Add Pages box is checked in the style panel. The option becomes visible in the style panel when you select the menu on the canvas.
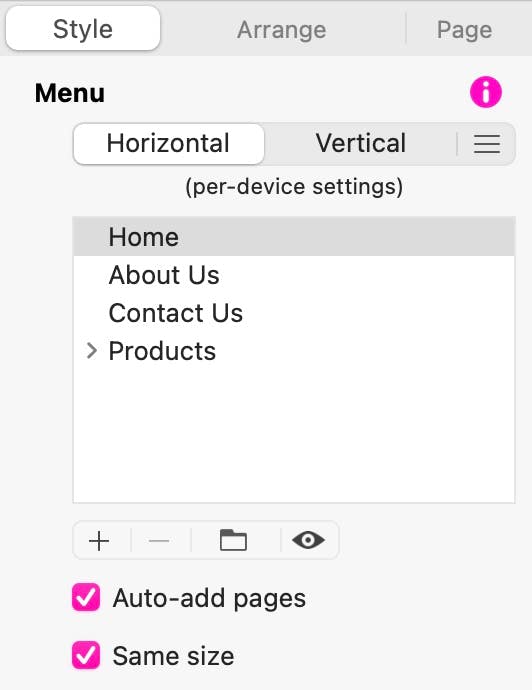
The style panel also gives you some additional options. For example, you can reorder the menu by simply dragging items up or down the list. For example, to place the Products section BEFORE the Contact Us page, just drag the products label up the list. Clicking the small arrow next to the Products item will reveal the two product pages in the list. You can also change your menu from a horizontal menu to a vertical menu by simply clicking the appropriate button. Additionally, you may like to have a compact, or hamburger menu (particularly for your mobile pages). Just click the hamburger icon to change the menu.
This is the vertical menu
when collapsed
This is the vertical menu
when expanded

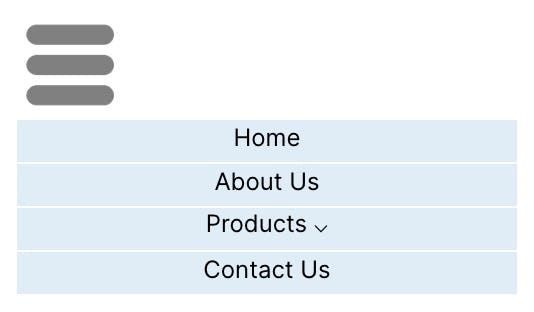
This is the compact menu option. The items are revealed when the icon is clicked
Menu Visibility
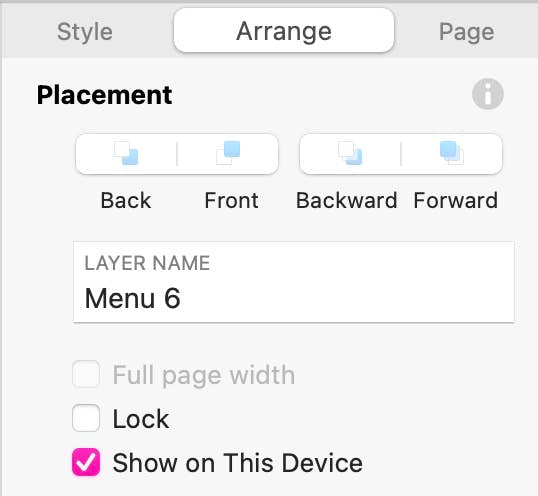
The Placement section allows you to choose to show the menu on the device you’re currently working on. Deselecting this option will hide the menu on the current device only, but keep it visible on other devices.
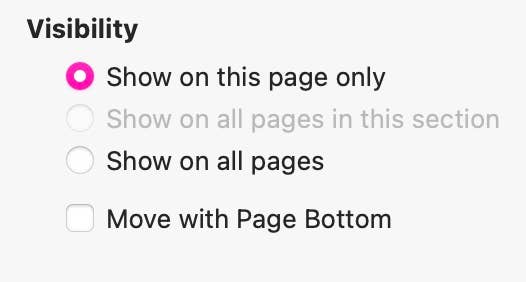
The Visibility section allows you to choose on which pages to show the menu. You can choose to Show on the current page only, all pages within the current Section, or Show on all pages in the site. You also have the option of having the menu Move with the page Bottom. This option is ideal if you have a menu of links in the footer section of your web pages, and you want to keep it glued to the bottom of the pages.
For most main site navigation, you would want your menu to be available on every page so that users can access it wherever they may be in your website. However, there may be situations where you want different menus to be available on different pages. These option give you complete control over this aspect of your website.
Per Device Options
Manually Creating your Menu
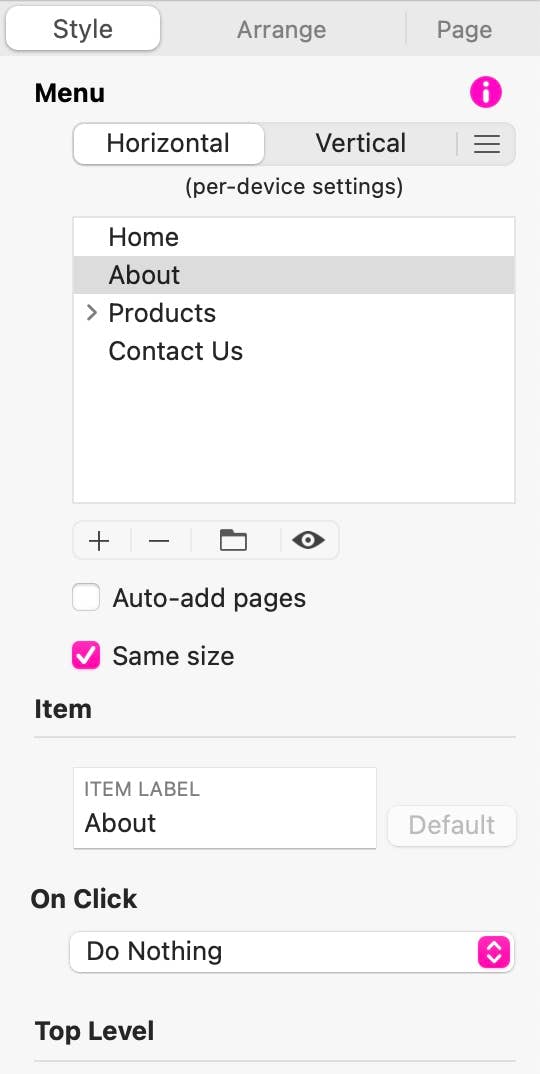
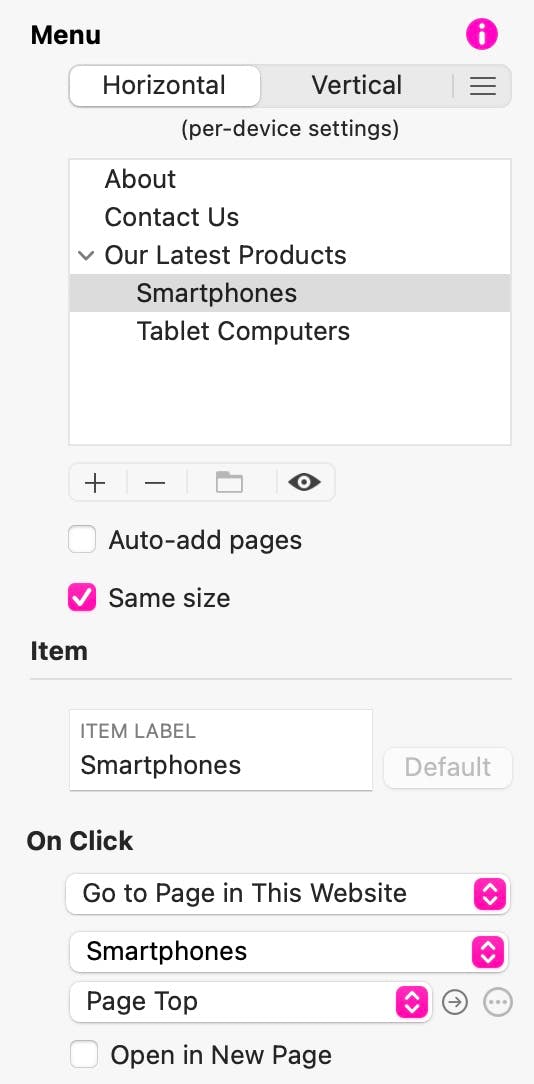
The Home link is automatically created for you and will point to the home page, or index.html page of your website. To add a new page link, click on the ‘+’ icon at the bottom of the menu panel. This will create a new link named Item. You can change the label of the item in the Item Label box. You continue to add new TOP LEVEL items in the same way.
To create a Section, first add a new top level item to the menu to act as the Section link. With that item selected, click on the Folder icon. This will create a page under the Section Link and place a small arrow against the Section link name . Your Section link will now become a link to open a drop-down of page links. To add more pages to the Section, click on one of the section pages and click the ‘+’ icon. Add as many pages as you need.
To go back to adding top level items, be sure to select one of the existing top level links before clicking the ‘+’ icon. When all your links are in place, you can start moving your menu items into the order you want them to appear in your final menu. Just click and drag them up or down the list.
When creating a menu manually, you will have to set the On Click action for each menu item. Typically, for most website menus, this action will be Go to Page in This Website. However, you have the freedom to chose from ANY of the On Click actions that Sparkle offers. When you use the Go to Page in This Website option, you will be able to choose the page from a drop-down list of all available pages. This assumes that the pages have already been created, so you may want to leave adding page links until after you have completed your website. Optionally, you can specify a scroll location within the linked page. In most cases, the link will simply point to the Page Top as illustrated here. In some cases, you may wish to have the linked page Open in New Tab. This is a feature you would typically use if the link was set up to open an external link, rather than a page within your site.
You would also manually create a menu if it is intended to be a supplementary menu, as opposed to a main website navigation menu. For example, you may have a main site menu that provides links to main landing pages in your site. A typical example may be a products landing page which highlights latest products from a broad range of product groups. However, you may wish to add a supplementary menu to that landing page where users can select specific product groups. In a fashion site such a menu may include links to Mens Fashion, Ladies Fashion and Children’s Fashion, Each of those links will take users to the relevant page featuring their choice of fashion items.
When a supplementary menu is first added to a page, it will, by default, contain a link to the home page. Clearly, that won’t be necessary because you already have such a link in your main navigation. Therefore, you would highlight the home link in the menu pane of the style panel and click on the ‘-‘ icon to remove that link from the supplementary menu. You may also want to do this in your main site navigation if, for example, you have a logo in your navigation bar that will be used as a home page link. To remove these links, you will have to deselect the Auto-add pages checkbox before deletion is possible.
Styling your Menu
Plain Text with Bottom
Border Highlight on Mouse Hover
Pill-Shape with colour fill
on Mouse Hover
Tab Style with colour change
on Mouse Hover
Button Style with colour change
on Mouse Hover
In addition to the normal styling options, there are a few additional options that are specific to menus. Let’s take a look at those now.
The first option is the Same Size option. Selecting this checkbox will make all the menu links the same size. If this option is deselected, the links will be sized individually according to their text content. Here are the differences.


There is also an item spacing option that sets the amount of space between items in the menu.

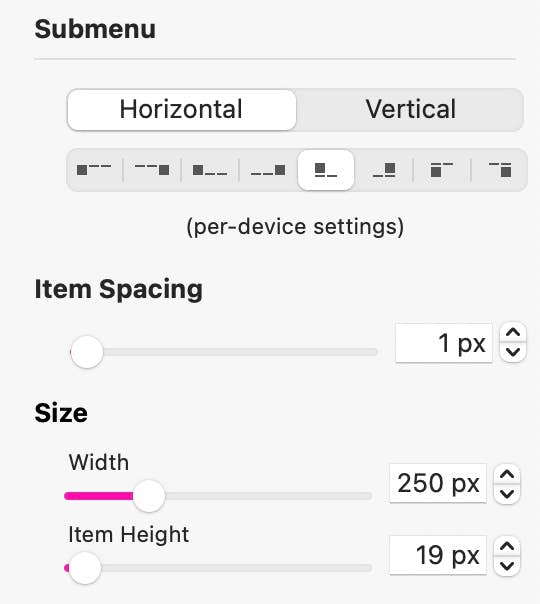
Next up is the Submenu options. These can be set differently for different devices. The first option specifies the placement of the submenu items in relation to the top level links. These choices vary depending on the type of menu you’re working with. Here we see the options for a horizontal menu. The submenu links can be placed above, below, to the left or the right of the top level item. The small icons give you a graphical representation of each available option. This section also allows you to set item spacing as well as width and height of the submenu items.
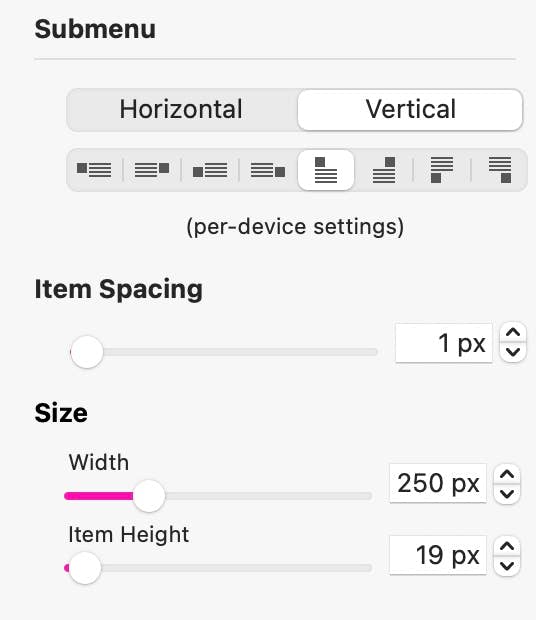
The vertical menu options are much the same, but with different submenu placement options. Again. the small icons give you a graphical representation of how things are placed relative to the top level items.
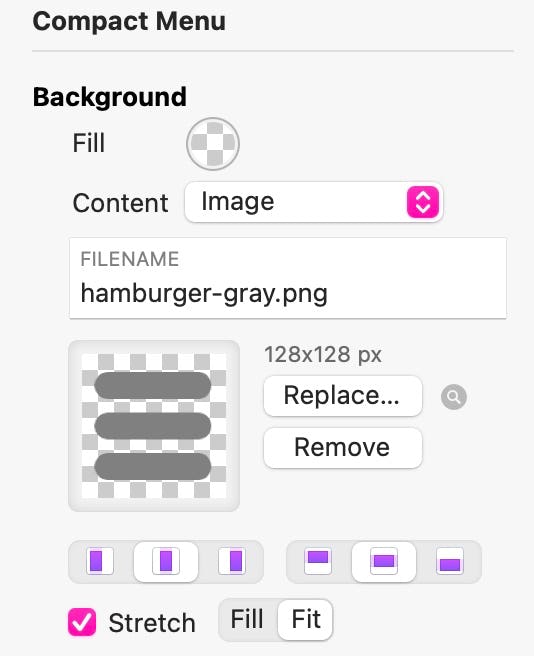
If you’re working with a compact menu, you will see similar options, with a choice of horizontal or vertical placement of sub menu items. In the case of a compact menu, the top level item is the icon that triggers the menu when clicked.
The icon itself can be changed by selecting the menu item in the menu list in the style panel. If you don’t want to use an icon, you can simply have a text link. Just give the menu Item a label and remove the icon. Your Compact menu will then be a simple text link like this. When this link is clicked, the submenu items will appear.
Note: if you do intend to use an icon, be sure to delete the menu label in the style panel to prevent it displaying under or over your icon.
Tips for Creating Effective Navigation

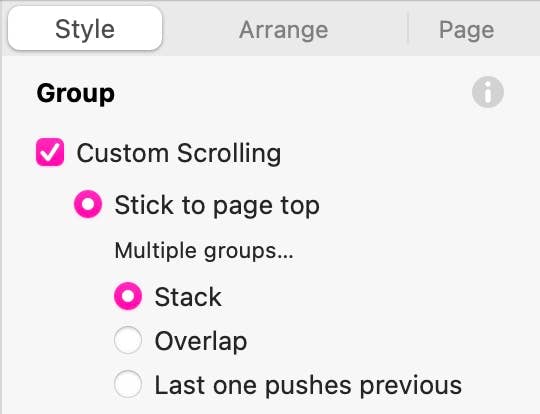
It comprises of a Logo image which has an on-click action to go to the home page, A telephone number which has an on-click action to call the phone number, A solid background box, and the menu item itself with all it’s page links. These elements have been Grouped to make a single element that can be positioned on the page. Furthermore, as a grouped element it can be made to stick to the page top, keeping it visible to users as they scroll the page. You set this up by selecting the group on the canvas and then checking the Custom Scrolling option in the style panel. This will reveal the Stick to page top option.
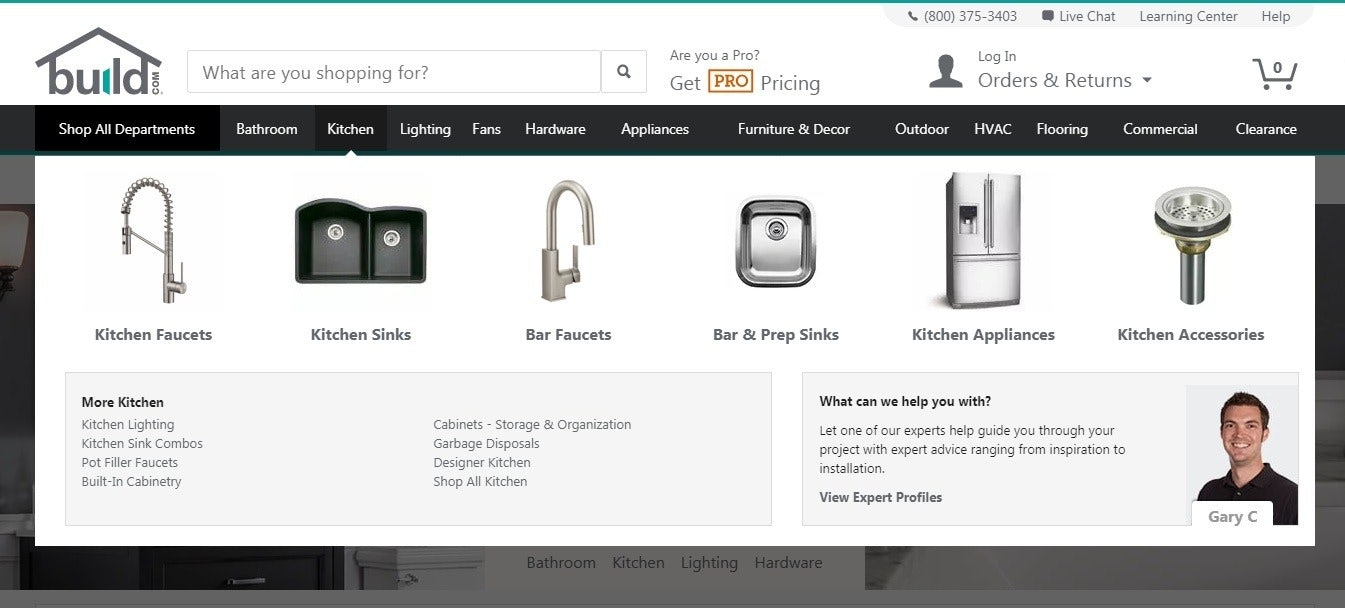
Try to keep Section Links to a minimum. Presenting too many choices as drop-down options can deter users from navigating your site further. Try and keep top level links to about five or six options, and if you do have drop-downs, try to keep the number of options to no more than four or five. If you simply must have users presented with a large number of options, maybe in an e-commerce site with many categories of products, consider creating a mega menu instead. This can be created in a Sparkle Layout block or Pop-up which is set to become visible when a top level menu link is clicked. You see menus like this in many multi product group sites, such as the one illustrated below.
When creating section links with a large number of drop-downs, have in mind that you will probably have to give a background to the drop-down links. If you leave them as transparent they may become difficult for users to read as the drop down will most likely cover other page elements when activated.
Please report any shortcoming in this documentation and we’ll fix it as soon as possible!
Updated for Sparkle 5.5
This website makes use of cookies.
Please see our privacy policy for details.
It’s Okay
Deny